Home Sauna Installation Mistakes
Sauna Construction Mistakes
So, I dove headfirst into building my own sauna—thinking, “How hard can it be?” Turns out, there are a couple of classic oopsies that everyone should dodge to keep their hot room ambitions from going up in smoke. Trust me, skimping on wood choice and botching the insulation are two rookie errors you want to skip.
Avoiding Wood Paint
Early on, I toyed with the idea of livening up the inside of my sauna with a slick coat of paint. Huge mistake! I quickly discovered that’s a big no-no. The pros say you gotta stick with the classic look—au naturel wood. Heat and paint mix like oil and water when you’re dealing with a sauna, mainly because paint cooks up nasty fumes, and that’s not the vibe I was going for. My trusty local sauna expert gave me a heads-up: keep it natural, keep it safe (Steam and Sauna Experts).
Insulation Errors
Getting and keeping my sauna toasty relies heavily on good insulation. Who knew? Messing this part up is like trying to fill a leaky bucket. You want to go with at least 100mm of mineral wool because it’s the real MVP when it comes to handling heat (Home Made Sauna). Did I mention the cash you’ll burn through with bad insulation?
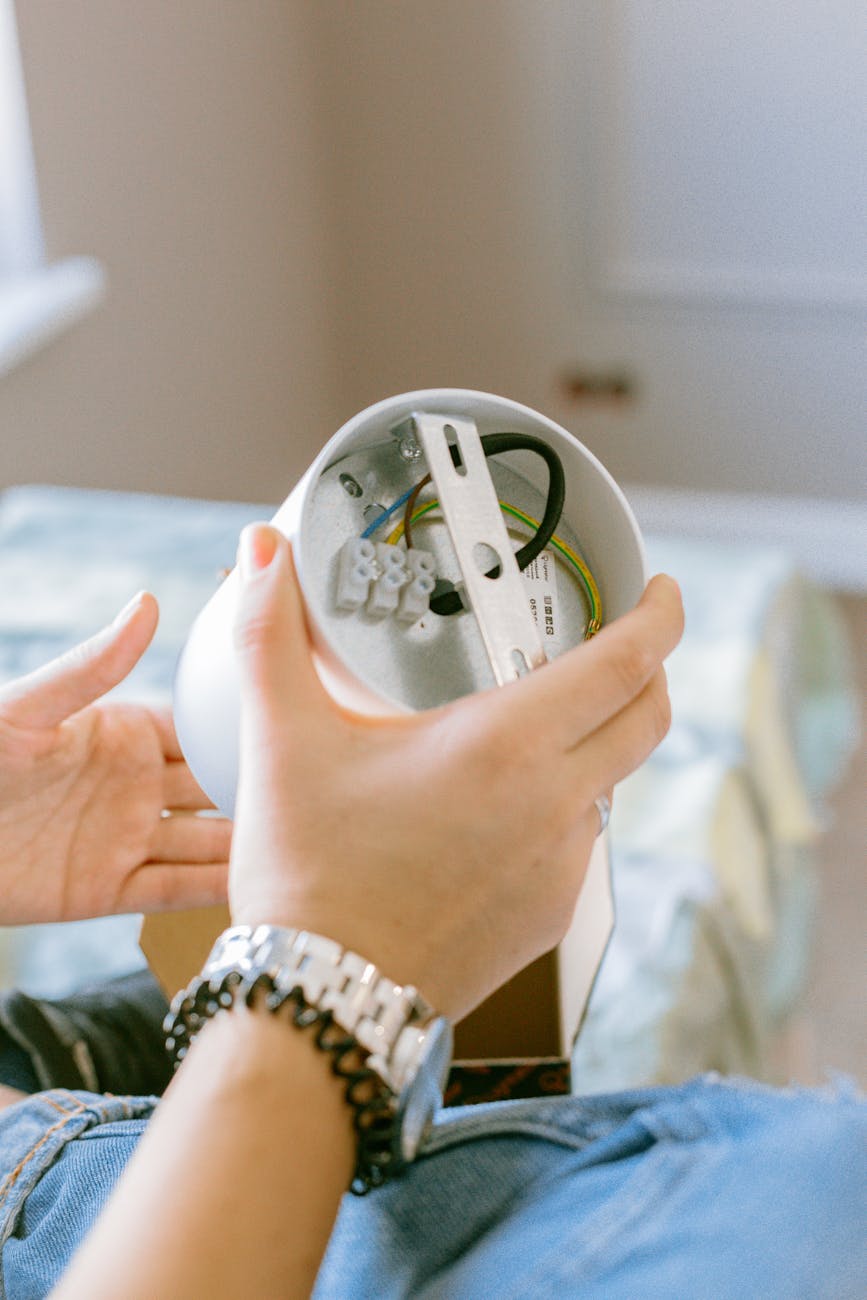
Now, let’s talk about electricity. Stick with me, because I nearly blew it here. Overlamping—never heard of it? Neither had I. That’s when you stick a too-big bulb into a socket and, surprise, things start overheating, leading to fires. Not cool, and trust me, you’ll be breaking some codes (This Old House).
And those extension cords? Yeah, tempting for sure. But one wrong cord choice and things might get toasty for all the wrong reasons. Always use heavy-duty ones if you absolutely can’t add more outlets; you really don’t want to mess around with this stuff (This Old House).
Dodging these pitfalls has me set for my personal, steamy hideaway to be a wicked hangout. If you’re eyeing up your own sauna project, peep this for tips on picking an ideal spot best location for home sauna.
Ventilation and Heating
Setting up my home sauna is all about getting that perfect mix of heat and airflow. Here’s how I make sure it’s done right.
Proper Ventilation Techniques
Skipping proper ventilation could turn my sauna into a stuffy, uncomfortable box. The trick is keeping that carbon dioxide in check, so it stays under 800 parts per million. Otherwise, I’d be gasping for air instead of relaxing.
Here’s the lowdown on getting proper ventilation:
- Fresh Air Intake: I pop an air intake vent down low, near the floor. This lets fresh outside air waltz right in. Having it adjustable? That’s the cherry on top for controlling the airflow.
- Exhaust Vent: The exhaust vent goes up high on the opposite wall. This lets all that sticky, warm air waft away, keeping the sauna air comfy and balanced.
- Maintain Air Circulation: I aim for new air every 10 to 15 minutes inside my sauna. This keeps CO2 from creeping past 500 ppm, giving me the most chill session possible.
| Component | Location You Want |
|---|---|
| Air Intake Vent | Near the floor |
| Exhaust Vent | Near the ceiling |
Picking the Right Sauna Heater
Now, finding the right heater is sort of like picking the best comfort food—it’s gotta suit my taste. Here’s how I pick:
- Type of Heater: I choose between traditional and infrared heaters. Traditional ones make steam and give me that classic, damp sauna feel, while infrared heaters are like a heat lamp, warmin’ me directly.
- Size of the Sauna: The heater needs the right punch for my sauna’s size. The rough idea is 1 kW of heat for each 50 to 60 cubic feet of space.
| Sauna Size (Cubic Feet) | Recommended Heater Size (kW) |
|---|---|
| Up to 150 | 3-4 |
| 151 – 300 | 4-6 |
| 301 – 450 | 6-8 |
- Safety Features: I make sure my heater’s loaded with safety stuff like overheat protection and an auto shut-off. This helps me relax without worrying about the house catching fire.
- Installation Requirements: I check the home sauna electrical requirements so there’re no shocking surprises during installation.
Getting the airflow right and picking a heater that suits me makes my sauna a sweet, personal retreat. If I’m curious about different heaters, I might peek into installing infrared sauna at home or weigh my options with DIY sauna installation vs professional.
Bench Placement and Interior Design
Getting the sauna just right is kinda like finding that perfect angle for your favorite chair—you just know it when you feel it. So, I’ve realized that a great sauna is all about where you stick those benches and what kind of wood you surround yourself with. A little tweak here and a dab of good judgment there can turn any sauna into your personal slice of steamy heaven.
Ideal Bench Height
Alright, let’s talk benches. Too low, and you might as well be in a breezy living room. Since hot air likes to hang out up high, the ideal spot for the top bench is between 100 to 120 cm off the ceiling. Yep, that’s where the magic starts happening. You want to feel like you’re in a warm hug, not in a chilly breeze.
Here’s a nifty little chart to help you out:
| Bench Level | Height in cm | Height in inches |
|---|---|---|
| Top Bench | 100 – 120 | 39 – 47 |
| Middle Bench | 75 – 85 | 29 – 33 |
| Bottom Bench | 45 – 55 | 18 – 22 |
Laying out your benches like this gets the hot stuff swinging around in the right places—transforming your sauna into the warm and bubbly retreat it should be.
Wood Selection for Sauna Interior
And then, we have the wood. Trust me, picking the right wood is half the fun. If you want a sauna that feels right and looks great, Aspen and Alder are your best friends. These fellas don’t have many knots, so they won’t turn your sauna into a smoke signal station. Plus, they’re pretty easy on Mother Earth.
If you want to play the long game, pressure-treated wood, especially for the damp areas like the bottom, is your go-to. If that’s a no-show at your local store, you can roll with 2×4 cedar—it’s like the pretty boy of the sauna world with its lovely aroma and natural good looks.
Here’s a quick breakdown for you:
| Wood Type | Style Points | High Fives |
|---|---|---|
| Aspen | Light & trusty | Few knots, practically odorless |
| Alder | Smooth operator | Holds heat well, giving that snuggly vibe |
| Cedar | Rustic charmer | Smells amazing, fights off decay like a champ |
Take all this into account, and you’re way ahead in the sauna game. Looking at where to place everything? Peek at the guide to finding the best spot for a home sauna. Trust me, getting these pieces in place turns a regular sauna day into an all-out escapade you’ll want to relive.
Sauna Electrical Installation
Setting up the electrical bits for my home sauna might sound a bit like rocket science, but with some know-how and a pinch of care, I’m good to go for a safe and sound setup. Here, I’ll guide you through figuring out the electrical needs for your sauna and dish out some must-know safety advice.
Sauna Electrical Power Calculation
First things first: how much juice do I need for my sauna? The trick here is pretty simple—1 cubic meter (m³) needs about 1 kilowatt (kW) of heating power. So if my sauna is 10 m³, I’ll need around 10 kW. Gotta keep in mind that windows or doors change things up a bit, so I’ll need a tad more power to keep it cozy inside.
Here’s a quick cheat sheet for figuring out sauna power needs:
| Sauna Size (m³) | Need Power (kW) |
|---|---|
| 5 | 5 |
| 10 | 10 |
| 15 | 15 |
| 20 | 20 |
Always check the heater’s manual, though—some like to do their own thing.
Sauna Electrical Safety Tips
Top of the list: safety! When it comes to fiddling with wires in the sauna, I keep these in mind:
-
No Overlamping: Don’t go wild with light bulbs. Using bulbs with wattage higher than the fixture’s limit is asking for trouble. Risks include overheating and, well, fires. Stick to the recommended wattage.
-
Get a Pro: If I’m scratching my head over the installation, better call in a licensed electrician. They make sure everything’s up to code and safe as houses.
-
Right Circuits: Make sure to use circuits designed for saunas. This ensures they can handle the load without breaking a sweat.
-
Only the Best Stuff: High-quality wires and fixtures are my go-to. They lower the chance of electrical mishaps, plus regular checks keep everything shipshape.
-
Mind the Moisture: Saunas are like a tropical paradise, which means moisture. Everything electrical needs to be moisture-resistant to play it safe.
With these pointers in my back pocket, I’m ready to tackle the sauna electrical setup with confidence. If I ever need more info on home sauna electrical needs, the home sauna electrical requirements guide is my next stop.
Sauna Maintenance Tips
Looking after a sauna ain’t just about keeping it looking spiffy. From what I’ve learned, if you skip on keeping your sauna in tip-top shape, you might end up with some pretty gnarly bacteria and even run into breathing problems. Here’s how I keep mine in check and stay safe while soaking up the heat.
Importance of Sauna Upkeep
Turns out, giving your sauna regular TLC actually helps it last longer. I’ve noticed that if I stay on top of things, my sauna doesn’t gulp energy like a thirsty camel and gives me a better chill time. Some things to watch for when it comes to sauna care:
| Benefit | Description |
|---|---|
| Longer Life | Regular TLC keeps the sauna humming for years. |
| Saving Energy | A well-looked-after sauna uses less power, easing those bills. |
| Better Experience | It’s just nicer being in a clean, well-cared-for sauna. |
Getting a pro in every few months to have a once-over on my sauna has been a real game changer. Keeps everything running like clockwork and safe as a house. As SaunaTutor points out, regular clean-ups, making sure stuff’s ventilated, and checking the wires are all big deals for safely running a sauna.
Sauna Cleaning and Safety Checks
I’m a stickler for cleaning up the sauna surfaces on the regular. The benches, walls, floors—everything gets the works with the right cleaners, so the wood stays intact. My routine’s pretty simple after each sweat session:
- Wipe Down Everything: I grab a damp cloth and give benches and walls a good wipe.
- Disinfect: Every couple of weeks, I hit surfaces with a gentle disinfectant.
- Vent Check: Ensuring vents ain’t blocked is key, letting air flow and keeping nasty gases out SaunaTutor.
Besides cleaning, I’m big on regular safety checks:
- Good Ventilation: It’s crucial to have proper ventilation to prevent any of that dangerous carbon monoxide from hanging around.
- Electrical Bits: I give the sauna’s wiring a look-see now and then to make sure it’s all working safely. Check our guide for nitty-gritty details on home sauna electrical requirements.
Keeping up these tasks transforms my sauna into a relaxing retreat that’s safe and sound. If the thought of getting a sauna tickles your fancy, consider delving into installing infrared sauna at home or finding the best location for home sauna for some handy tips.
Sauna Ventilation Solutions
Getting the airflow right in my sauna is as key as nailing the build. I’ve found that the right kind of ventilation not only amps up the whole vibe but it’s also a must for keeping the air fresh and safe. Here’s what I’ve picked up about keeping the air sweet and a few tricks for getting the ventilation just right.
Sauna Air Quality Concerns
While I’m kicking back in my sauna, keeping an eye on the air quality’s a big deal. Without proper airflow, carbon dioxide can sneak up on me – not what I’m after. I aim to keep CO2 below 800 ppm for a comfy session (HomeMadeSauna).
| Air Quality Measurement | Recommended Level |
|---|---|
| Carbon Dioxide (CO2) | Below 800 ppm |
| Ideal Sauna Experience | Below 500 ppm |
If CO2 levels creep up too much, it can mess with my head or make me feel queasy, which is just a buzzkill. The game here is to keep the fresh air flowing in and the stale stuff flowing out.
Best Practices for Sauna Ventilation
To get the best vibes in my sauna, I’ve got a few tricks up my sleeve:
-
Fresh Air Exchange: Set up the sauna so stale air gets swapped for fresh stuff. I’ve done this with vents near the floor for cool air to sneak in, while the toasty air makes its getaway up top.
-
Maintain CO2 Levels: I’m shooting for CO2 levels under 500 ppm for the dream sauna sesh (Sauna Times). A good CO2 monitor helps me keep tabs.
-
Avoid Obstructions: I make darn sure those vents are clear. No benches or junk in the way, so the air can move how it should.
-
Regular Maintenance: Every so often, I give the ventilation system a once-over to check for clogs or busted parts. Keeping things clean is key to steady air exchange.
-
Seasonal Adjustments: When the weather or use changes, I tweak the ventilation to keep things just right inside.
Following these tricks and keeping the air right means my sauna time stays top-notch, avoiding those rookie home sauna installation mistakes. If you’re thinking of adding a sauna to your pad, sorting out the ventilation is a total must for an awesome experience.




3 Comments
Comments are closed.